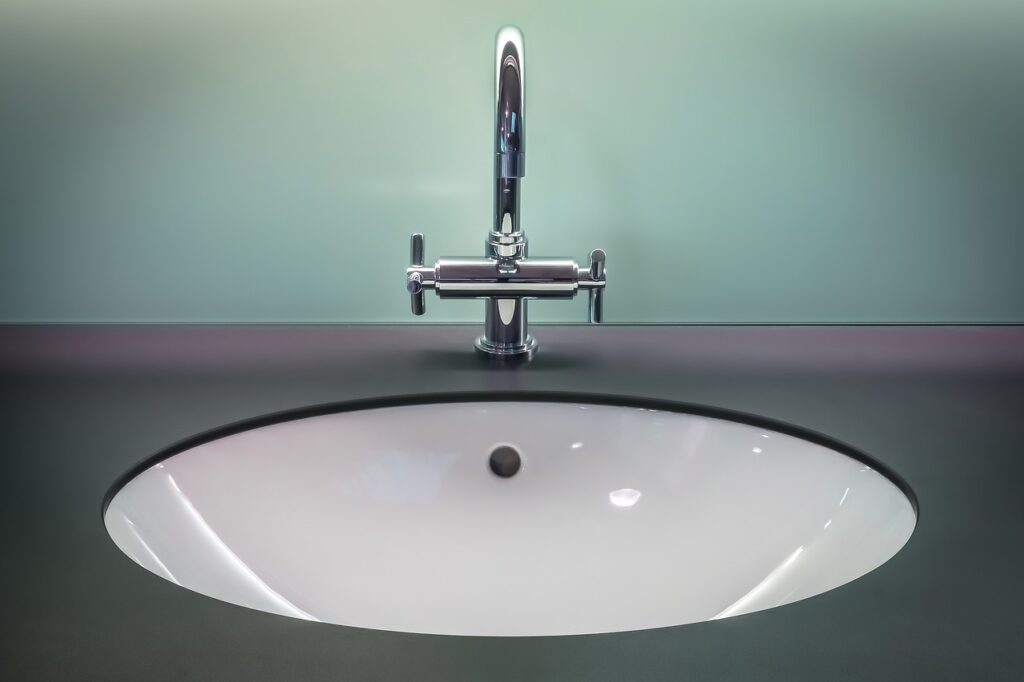
If you have porcelain cracks in the sink, don’t worry! You can fix it yourself using a few simple tools and a little bit of elbow grease. In this blog post, we’ll show you how to fix a crack in your porcelain sink. We’ll also give you some tips on how to avoid cracking your sink in the first place. Keep reading for instructions on how to fix a cracked sink basin!
- 8 Steps of How to Fix a Cracked Porcelain Sink
- Choose the Right Cracked Sink Repair Kit
- Prepare the Cracked Area
- Mix the Resin to be Applied
- Add Tint to the Resin
- Apply the Resin
- Smooth the Resin & Allow the Resin to Dry
- Sand and Smooth the Repaired Area
- Paint (optional)
- Best Porcelain Crack Filler
- Tools needed to Fix a Cracked Porcelain Sink
- Steps to Repair a Hairline Crack in Porcelain Sink
- Clean the sink thoroughly
- Sand the affected area
- Prepare & apply the epoxy
- Apply the repair kit paint
- Re-glaze the sink (optional)
- Reasons for hairline cracks in porcelain sinks
- Ways to Prevent Your Sink From Cracking and Chipping
- 1. Clean your sink regularly with a mild detergent and water to remove any food or grease buildup
- 2. Don’t use harsh chemicals, such as bleach, on your sink
- 3. Avoid dropping heavy objects into your sink
- 4. Use a soft cloth to dry your sink after washing dishes or hands
- 5. Place a trivet or heat pad under hot pans and pots to protect the surface of your sink
- FAQs
8 Steps of How to Fix a Cracked Porcelain Sink
Choose the Right Cracked Sink Repair Kit
A cracked sink can be a major inconvenience in your home. Not only is it unsightly, but it can also lead to leaks and water damage. Luckily, there are a variety of repair kits available that can help you fix a cracked sink quickly and easily.
When choosing a repair kit, the first step is to identify the type of sink you have. Repair kits are typically designed for either porcelain or enamel sinks. If you’re not sure which type of sink you have, take a close look at the finish. Porcelain sinks have a smooth, glossy finish, while enamel sinks have a more matte finish.
Once you’ve determined the type of sink you have, you can select a repair kit that matches. Most kits come with everything you need for the repair, including instructions.
With the right repair kit, fixing a cracked sink is a simple process. In just a few minutes, you can have your sink looking like new again.
Prepare the Cracked Area
The next step to fix a cracked porcelain sink is to prepare the cracked area. You will need to use a putty knife to remove any loose pieces of porcelain from the crack. Next, use sandpaper to roughen the edges of the crack. This will help the epoxy adhere to the sink. Finally, clean the area with a damp cloth to remove any dust or debris. Once you have prepared the cracked area, you are ready to move on to the next step in repairing your sink.
Mix the Resin to be Applied
Completing a porcelain sink repair is not as difficult as it may seem. With the right supplies and a little bit of patience, you can fix a cracked sink in just a few hours. The next step is to mix the resin to be applied. experts recommend that you use a two-part epoxy resin for this project. to mix the resin, start by reading the instructions on the package. most resins will require you to mix equal parts of the resin and hardener.
Add Tint to the Resin
The next step is to add tint to the resin. You will need to mix the tint with the resin in order to create a color that closely resembles the color of your sink. Once you have mixed the tint and resin together, you will need to apply them to the crack in your sink. You can do this by using a putty knife or a similar tool.
Apply the Resin
After you have sanded the area around the crack, it is time to apply the resin. The resin is a glue that will hold the pieces of the sink together and prevent the crack from growing. Once you have applied the tinted resin to the crack, you will need to let it dry for several hours before using your sink again.
Smooth the Resin & Allow the Resin to Dry
If you have a cracked porcelain sink, the next step is to smooth the resin and allow it to dry. This will help to create a seamless repair that will last for years to come. First, use a putty knife to smooth the resin into the crack. Next, use a hair dryer or heat lamp to gently warm the resin. This will help to cure the resin more quickly. Finally, allow the resin to dry completely before using the sink again. With this simple fix, you can keep your sink looking like new for years to come.
Sand and Smooth the Repaired Area
After you have glued and clamped the sink, it is now time to sand and smoothes the repaired area. You will want to use fine-grit sandpaper so that you do not damage the porcelain. Start with gentle strokes and work your way up to firmer strokes until the area feels smooth. Next, wipe away any dust with a damp cloth. Once the area is dry, you can apply a new layer of glaze if desired. Finally, buff the area with a soft cloth to give it a shine.
Paint (optional)
The last step to fixing a cracked porcelain sink is to paint the repaired area. This will protect the sink from future wear and tear, and it will also give it an updated look. When choosing paint for a porcelain sink, be sure to select a type that is made specifically for use on ceramic or porcelain surfaces. Applying a coat of paint to the sink is a simple task that can be completed in just a few minutes. With just a little time and effort, you can give your sink a whole new look.
Best Porcelain Crack Filler
When it comes to filling cracks in the porcelain, there are a few different options to choose from. Super Glue is one of the most popular choices, as it is easy to use and dries quickly. However, it is not always strong enough to fill large or deep cracks. For deeper cracks, epoxy putty or resin is a better choice. These products take longer to set, but they will create a stronger bond that is less likely to come apart.
Porcelain filler can also be used to fill in chips or other small imperfections. This product is similar to putty or resin, but it is specifically designed for use on porcelain surfaces. It dries hard and can be sanded or painted to match the surrounding area. No matter which option you choose, it is important to clean the surface thoroughly before applying the filler. This will help ensure that the filler adheres properly and creates a strong bond.
Tools needed to Fix a Cracked Porcelain Sink
Epoxy resin
Epoxy resin is a type of plastic that is frequently used for repairs. It is strong and durable, making it ideal for fixing a cracked porcelain sink.
While the epoxy resin is a great option for fixing a cracked porcelain sink, it is important to note that the repair will not be invisible. The epoxy resin will likely be a different color than the surrounding porcelain, so it will be visible once it dries. However, this should not affect the function of your sink. Epoxy resin is an affordable and easy way to fix a cracked porcelain sink.
A putty knife
A putty knife can come in handy for more than just spreading putty. You can also use it to fix a cracked porcelain sink. First, clean the area around the crack with a mild cleanser. Then, apply a generous amount of epoxy to the crack, using the putty knife to work it into the crack. Once the epoxy has had a chance to set, use the putty knife to smooth it out so that it is level with the rest of the sink. With a little time and effort, you can use a putty knife to fix a cracked porcelain sink.
Acetone
Acetone is a powerful solvent that can be used to repair a variety of materials, including porcelain. If your porcelain sink has developed a crack, you can use acetone to repair it. Simply apply a small amount of acetone to the crack and wait for it to dry. The solvent will weld the porcelain together, creating a strong bond that will return your sink to its original condition.
In addition to repairing cracks, acetone can also be used to remove stubborn stains from porcelain surfaces. Simply apply a small amount of acetone to the stain and scrub it away with a soft cloth. For best results, be sure to rinse the area with water afterward.
Sandpaper
One simple way to fix a cracked porcelain sink is to use sandpaper. Start by wetting the sandpaper and then rubbing it back and forth over the crack. The goal is to evenly sand down the edges of the crack so that they are flush with the rest of the sink. Once you have achieved this, rinse away any sanding debris and dry the sink. In most cases, this will be enough to stop the crack from spreading any further.
If the crack is particularly large or deep, you may need to apply a patch or use another type of repair method. However, for small cracks, sanding is often all that is needed to keep your sink looking like new.
How to Hide Cracks in Porcelain Sink
There’s nothing worse than finding a crack in your porcelain sink. Not only is it unsightly, but it can also cause leaks and other problems. Fortunately, there are a few ways to hide cracks and keep your sink looking its best.
One option is to use caulk. Simply clean the area around the crack, then apply a bead of caulk along the length of the crack. Use a wet finger to smooth out the caulk, then allow it to dry. This will create a waterproof seal that will help prevent further damage.
Another option is to use epoxy putty. This is a pliable material that can be molded to fit over the crack. First, clean the area around the crack and apply a layer of putty. Then, use your fingers to press the putty into place and smooth it out. Allow the putty to dry for several hours before using the sink.
With a little effort, you can easily hide cracks in your porcelain sink and keep it looking like new.
Steps to Repair a Hairline Crack in Porcelain Sink
Clean the sink thoroughly
First, clean the sink thoroughly. You need to remove all soap scum, toothpaste, and anything else that might be on the sink. This will help the repair kit adhere better to the porcelain. Next, use a putty knife to apply the porcelain filler to the crack.
Sand the affected area
Fine-grit sandpaper is often used to repair hairline cracks in porcelain sinks. The sandpaper smooths out the edges of the crack, making it less visible. It also helps to prevent the crack from spreading. To use sandpaper to repair a hairline crack in a porcelain sink, first clean the area around the crack with soap and water.
Then, dry the area completely. Next, apply a small amount of glue to the edge of the crack. Place a piece of sandpaper over the glue and press it down firmly. Allow the glue to dry for several hours before proceeding to the next step. Finally, use a damp cloth to remove any excess glue from the sandpaper.
Prepare & apply the epoxy
To mix the epoxy, start by combining equal parts of the resin and hardener. Once these two ingredients are mixed together, add a small amount of colorant until you achieve the desired shade. Work slowly and carefully to avoid creating any air bubbles.
Once the epoxy has been applied, allow it to cure for 24 hours before using the sink again. With proper care and maintenance, your repaired sink should last for years to come.
Apply the repair kit paint
Fortunately, there are repair kits available that can help in porcelain sink crack repair. These kits typically come with everything you need to complete the repair, including paint and adhesive.
To use the repair kit, simply follow the instructions provided. In most cases, you’ll need to clean the area around the crack and then apply the repair paint. Once the paint is dry, you can then apply the adhesive and allow it to set.
Re-glaze the sink (optional)
This process involves sanding down the surface of the sink to smooth out any rough edges, then applying a new layer of glaze. Re-glazing the sink will not only repair the hairline crack but will also give the sink a brand-new look.
Reasons for hairline cracks in porcelain sinks
Structural Changes & Nature
Hairline cracks in porcelain sinks are due to structural changes in the sink itself. Over time, the sink may expand or contract slightly due to changes in temperature or humidity. This can put stress on the porcelain, causing it to crack. In addition, porcelain is a relatively brittle material, so it is susceptible to damage from impacts. If something hits the sink hard enough, it can cause a hairline crack.
Temperature Changes
In most cases, these cracks are purely cosmetic and do not affect the function of the sink. However, if they are left untreated, they can gradually become larger and more numerous, eventually leading to leaks. Fortunately, there are a few simple steps that can be taken to prevent or repair hairline cracks in porcelain sinks.
First, it is important to avoid sudden temperature changes, as this can cause the material to expand or contract too quickly and result in cracking. Second, if the sink is already cracked, it is important to seal the cracks with a silicone-based sealant to prevent water from seeping through.
Blunt Force
Though these cracks may be small, they can cause big problems by trapping dirt and allowing bacteria to grow. In most cases, hairline cracks in porcelain sinks are caused by blunt force. This could be something as innocuous as dropping a dishcloth or mistakenly bumping the sink with a heavy pot. Porcelain is a strong material, but it is not immune to damage.
Ways to Prevent Your Sink From Cracking and Chipping
1. Clean your sink regularly with a mild detergent and water to remove any food or grease buildup
Your sink sees a lot of action every day. From washing dishes to brushing your teeth, it’s constantly exposed to water, soap, and other potential sources of damage. Over time, this can lead to cracks, chips, and other types of wear and tear.
To help prevent this from happening, it’s important to clean your sink regularly. A mild detergent and water are all you need to remove any food or grease buildup. You should also be sure to dry the sink after each use to help prevent water spots.
2. Don’t use harsh chemicals, such as bleach, on your sink
Over time, the constant use of harsh chemicals on your sink can lead to cracks and chips on the surface. The chemicals can break down the sealant that is used to protect the sink and cause it to become dull and faded. In addition, the chemicals can react with the metal in the sink, causing it to corrode. If you want to keep your sink looking its best, it’s important to avoid using harsh chemicals. Instead, opt for gentle cleansers that won’t damage the surface. For tough stains, try using a natural cleaner like vinegar or lemon juice.
3. Avoid dropping heavy objects into your sink
Have you ever dropped a piece of silverware into your sink and cringed as it made a loud clanging noise? Although it may seem durable, your sink is actually quite fragile and can be easily damaged by heavy objects. The porcelain or ceramic material is particularly susceptible to cracking and chipping, and even a small chip can mar the surface of your sink. dropping a heavy object into your sink can also cause the drain to become dislodged, resulting in leaks.
For these reasons, it’s important to be careful when handling items around your sink. Make sure to use both hands when lifting anything heavy, and take extra care when loading dishes into the dishwasher. By taking a few simple precautions, you can help prevent damage to your sink.
4. Use a soft cloth to dry your sink after washing dishes or hands
Over time, your sink is subject to a lot of wear and tear. To prevent your sink from cracking and chipping, it’s important to dry it after each use. The best way to do this is with a soft, absorbent cloth. This will help to remove any water that has pooled on the surface of the sink, preventing it from seeping into any cracks or crevices. In addition, wiping down the sink after each use will help to keep it looking clean and new. over time, your efforts will pay off, and you’ll be able to enjoy a sink that looks as good as new.
5. Place a trivet or heat pad under hot pans and pots to protect the surface of your sink
A trivet or heat pad placed under hot pans and pots is an easy and effective way to prevent your sink from cracking and chipping. By evenly distributing the heat, a trivet or heat pad helps to prevent thermal shock, which can cause sink surfaces to crack. In addition, a trivet or heat pad can also help to prevent scratches and scuffs. By protecting your sink from direct contact with pots and pans, you can help to keep it fresh as always. Whether you’re cooking a holiday feast or simply heating up a can of soup, remember to always use a trivet or heat pad to protect your sink.
FAQs
Is it possible to repair the broken sink?
Yes, it is possible to repair a cracked or chipped sink. However, the extent of the damage will determine whether you need to replace the entire sink or just a small section.
What is the estimated cracked sink repair cost?
The cost of repairing a cracked sink will vary depending on the severity of the damage. If you need to replace the entire sink, you can expect to pay anywhere from $200 to $500. However, if the damage is minor, you may be able to get away with just replacing a small section of the sink. This could cost as little as $50.
Are cracks in the sink bowl repairable?
Yes, cracks in the sink bowl can be repaired. However, the repair will not be invisible and you may be able to see the seams where the two pieces of the sink were joined together.
How do I know if my sink is ceramic or porcelain?
You can usually tell if your sink is ceramic or porcelain by color. Porcelain sinks are typically white or cream-colored, while ceramic sinks can be a variety of colors.
How to fix a cracked bathroom sink?
Fixing porcelain sink cracks can be done by using a natural cleaner like vinegar or lemon juice. If the damage is more severe, you may need to replace the cracked sink with a new one.
If your copper sink seems dirty then read this article for a better understanding that how to clean a copper sink.